Dental Laboratory
Associates, Inc.
1312 Drayton Street
Savannah, GA 31401
ph: 912 238 0342
fax: 912 238 3049
alt: 800 831 0863
dentalin

Bars
 Implant retained bars for totally edentulous patients was the original concept Dr. Branemark envisioned for the using dental implants. Initially the concern with implants was primarily function and predictable surgical techniques with very few options available for restorative procedures. Also most of the early studies on implants discovered there were better survival rates for implants that were splinted together, 5 to 6 implants splinted together had the highest survival rates in the maxilla where we find poor quality bone.
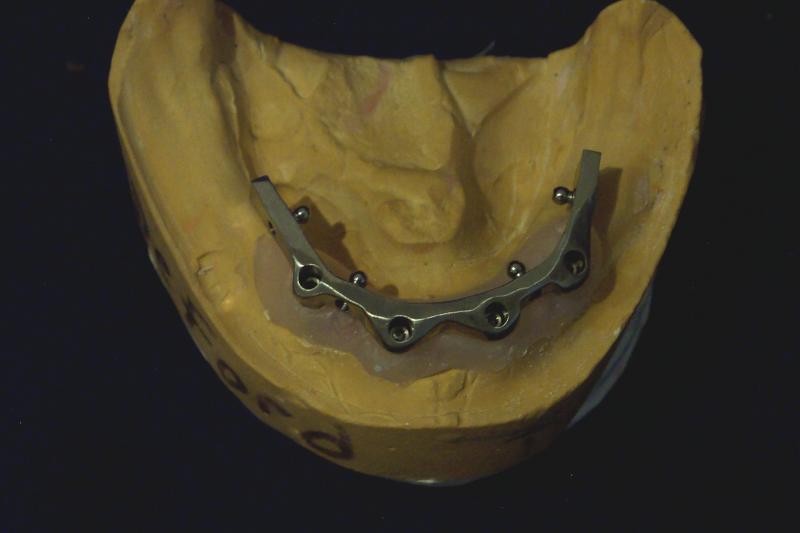
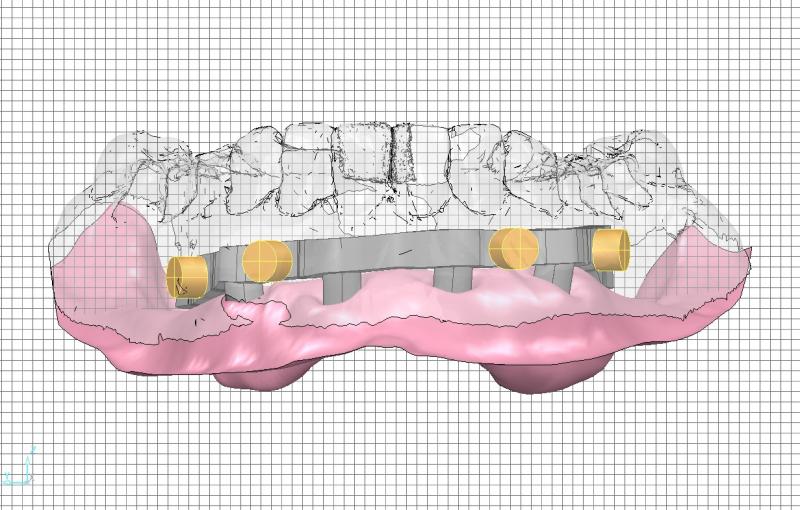
Bars can be an excellent restorative option for the totally and partially edentulous patient today! CAD/CAM has made the fabrication of the bars much more accurate and less technique sensitive for the laboratory because the bars are milled from a solid piece of titanium. This also eliminates the potential for weakness caused by soldering or laser welded joints. The milled bars are available for implant overdentures, fixed-hybrid prostheses and fixed bridgework and can be implant level or tissue level using transmucosal abutments (Conical Abutments, Standard Abutments, etc.). We can create our own unique designs by copy milling a resin pattern. Attachments can also be incorporated in the bars to provide better retention for overdentures.
DLA has been fabricating implant supported restorations since 1984, we were Branemark trained in 1989 on fixed-hybrid prostheses and implant retained overdentures. Over these years we have found that if we follow a "recipe", these cases are as easy to restore as any other restoration you prescribe.
Sequencing:
First appointment we need initial impressions for the fabrication of Occlusal Rims, also we can make a custom tray for the implant level impression.
Second appointment is for the implant or abutment level impression and verifying the VDO. Follow the instructions for open or closed tray impressions.
Third Appointment is for try-in of the denture set-up and the try-in of the verification index to ensure our master model is accurate. Remove the healing abutments or caps and place the verification index onto the implants or the abutments. Place a try-in screw into one posterior abutment and visually verify a passive fit. If the interfaces are subgingival take a radiograph to verify passive fit. Remove the try-in screw and place on the opposite side and repeat. If a discrepancy is found, section the index and reassemble it intraorally by luting with a resin material. Remove the index. Immediately replace the healing abutments or caps. Place the wax try-in into the mouth. Verify occlusion, esthetics, and phonetics. Make any necessary adjustments. If major adjustments are necessary, make a new interocclusal record.
Fourth appointment is to try-in the bar and verify that the bar has a passive fit. Remove the healing abutments or caps. Place the bar onto the implants or the abutments. Place one try-in screw into one posterior abutment and visually verify a passive fit, if the interface is subgingival take a radiograph to ensure passive fit. Remove the try-in screw and place on the opposite side and repeat. Remove the bar and immediately replace the healing abutments or caps. If a new set-up was required, try-in and verify occlusion, esthetics, and phonetics.
Fifth appointment is to verify the set-up on the bar. Remove the healing abutments or caps. Place the bar onto the implants or abutments and thread the try-in screws into the implants or the abutments and finger tighten. Verify that the bar is completely seated. If an overdenture is prescribed place over bar. Verify occlusion, esthetics, and phonetics and make any adjustments. Also verify gingival contours of the prostheses if a fixed hybrid. Remove the bar and immediately replace the healing abutments or caps.
Sixth appointment is for final delivery. Remove the healing abutments or caps. Place the bar onto the implants or the abutments and thread the final screws until finger tight. Visually verify a passive fit on all interfaces. If the interfaces are subgingival, take a radiograph. If an overdenture is prescribed, place the secondary prosthesis onto the bar and engage the attachments. Make any occlusal adjustments necessary. Torque screws to the manufacturer recommended level. Place protective material over screw heads. Seal the access holes with composite and polish. Instruct the patient on proper oral hygiene.
When treatment planning for fixed hybrid, inform the patient that the bar should be removed annually to inspect the implants, the surrounding soft tissue, and the bar, it is a good idea to replace the retaining screws periodically.
1312 Drayton Street
Savannah, GA 31401
ph: 912 238 0342
fax: 912 238 3049
alt: 800 831 0863
dentalin